Seat maps
Draw your room with rows, tables, a stage and a bar – customers pick their own seats when they buy tickets.
Under Events → Seat maps you draw your room once and use it for as many events as you like. Customers then pick their own seats when they buy tickets – in a cinema, theatre or concert hall, at a dinner show or in a circus tent.
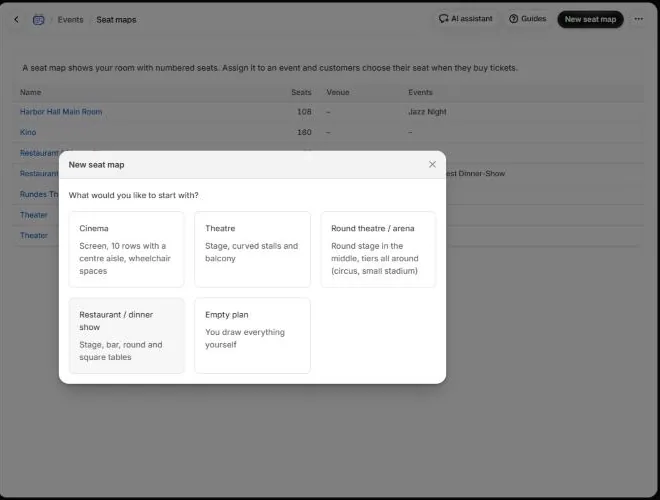
Create a seat map
- 1Click New seat map and choose a template: Cinema, Theatre, Round theatre / arena, Restaurant / dinner show or Empty plan.
- 2Enter the Name of the plan and, if you like, choose a Venue.
- 3Adjust the plan and click Save.
Draw rows, tables and more
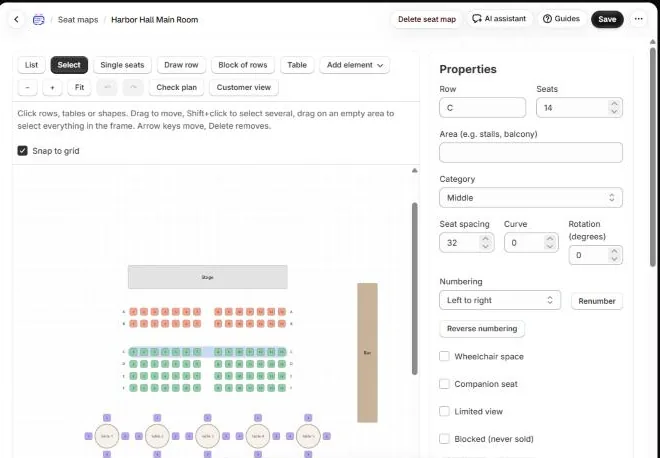
- Draw row: drag across the plan from left to right – the number of seats follows from the length.
- Block of rows: inserts several rows at once, with Rows, Seats per row, an aisle (Aisle after seat) and a Curve; rows are labelled A, B, C … or 1, 2, 3.
- Table: round or square tables with up to 20 chairs.
- Add element: a stage, screen or bar as a rectangle, a circle, or a label such as “Entrance”.
- Select moves, turns and duplicates elements; Shift+click selects several. Single seats changes single seats or removes them for an aisle.
When a row is selected, Properties shows its seats, spacing, curve and rotation. Under Numbering choose Left to right, Right to left or odd and even sides and click Renumber; Reverse numbering turns the numbers round (1 … 14 becomes 14 … 1). Seats can be marked as Wheelchair space, Companion seat, Limited view or Blocked (never sold).
Categories and prices
Every seat belongs to a category, for example Front, Middle and Table. You add them under Categories with Add category and give them a colour. Prices are not set in the plan but in the event: each category gets a ticket type with its own price there.
Use a seat map for an event
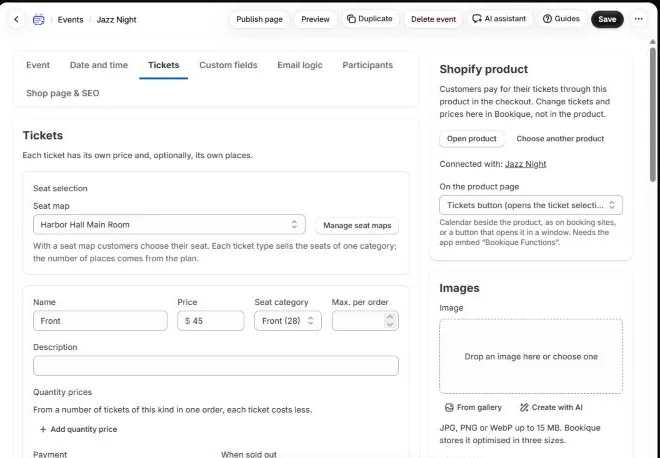
- 1Open the event and go to the Tickets tab.
- 2Under Seat selection, choose the Seat map.
- 3Choose a Seat category for each ticket type, for example the category Front for the ticket “Front”.
The number of places comes from the plan: each ticket type sells the seats of its category. A ticket type without a category is not sold. Manage seat maps takes you to the plans.
How customers choose their seats
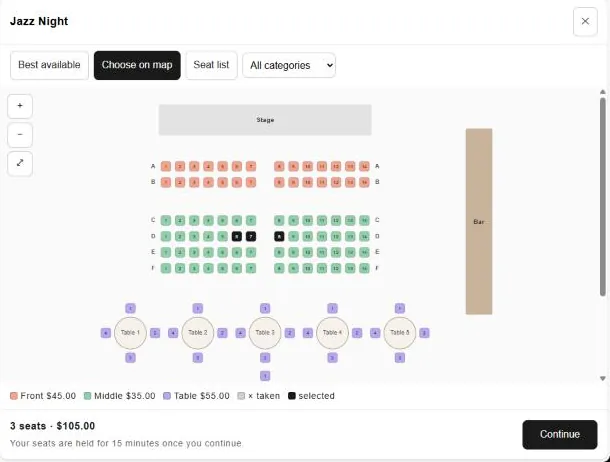
On the product page and the event page customers click Choose seats. The plan opens over the whole page: customers tap their seats, let Bookique pick the Best available ones or look through the Seat list. Taken seats are grey with ×. With Ticket selection right on the page the plan is shown in the ticket box itself.
As soon as customers continue, Bookique holds their seats for 15 minutes for the checkout. The seats are shown in the cart, the confirmation email, the customer account, the booking and at check-in. When you move tickets to another date, their seats move along.
Screenshots show the app in English.
Need help?
Write to support@cronema.com – we answer in English and German.